
This web site is under construction and contains details of products that will become available in 2024. Details of current DryFire products may be found at: www.dryfire.com
DPS-AM: DPS Adjustable Mount
The DPS Sensor Unit has screw-in feet so its vertical angle can be adjusted when facing the projected image.
The optional DryFire Projection System Adjustable Mount (DPS-AM):
- makes it very easy to set up the DryFire Projection System Sensor Unit (DPS-SU),
- makes it very quick to set the correct vertical angle for the DPS-SU,
- can be screwed to a surface to prevent the DPS-SU being knocked over,
- ensures your DPS-SU remains set up in the same way between shooting sessions,
- allows your DPS-SU to be ceiling mounted if required.
The DPS-SU has a tripod mounting bush in its base so it may be used on any horizontal surface (with its feet used to set the required vertical angle) or on a tripod (using the tripod head to set the angle). See below for examples.
DPS-AM screws into the DPS-SU tripod mounting bush and vertical adjustment is done with an Allen key. This makes it very quick and easy to set the perfect vertical angle for the DPS-SU.

DPS-AM comes with an acrylic mounting plate so the system can be free to move or screwed to a suitable horizontal surface - preventing your valuable DPS-SU being knocked over and ensuring the system is set up in the same way between shooting sessions.
DPS-AM also allows the DPS-SU to be ceiling mounted - behind a ceiling mounted projector. Screwing the mounting plate to the ceiling allows the position of the DPS-SU to be adjusted so it is looking downwards at the correct angle for the screen.
Fitting instructions
DPS-AM is available from the store
Handy Hint
When setting up the system the DPS-SU will be facing the screen and you will be standing behind it to adjust the position and angle.
For a right-handed person it is best for the head of the adjustment screw to be on the right of DPS-AM - as seen from the back - "Starboard" in nautical terms! This allows you to adjust things with your left hand and tighten the screw with an Allen key in the right hand.
For a left-handed person the screw head should be on the left ("Port").
You will need:
Why don't we provide tools?
- Decent tools would add £10 plus to the price.
- Cheap tools, to keep the cost down, are often made inaccurately and of cheap material.
- Most people have screwdrivers and a set of Allen keys. The 4mm key may be slightly unusual in imperial USA and the 3/6" may be slightly unusual elsewhere.
- An investment in quality tools is never wasted, so, if you don't have one of the tools listed above, follow the link and buy something that will last a lifetime.
Imperial and metric Allen keys (or Allen wrenches) may be purchased individually or in sets. The "ball end" versions are the easiest to locate and use - though they are slightly more expensive. Those with a screwdriver-style handle, such as those made by Bondhus or RS, are the easiest to use - and least likely to get lost!
Steps
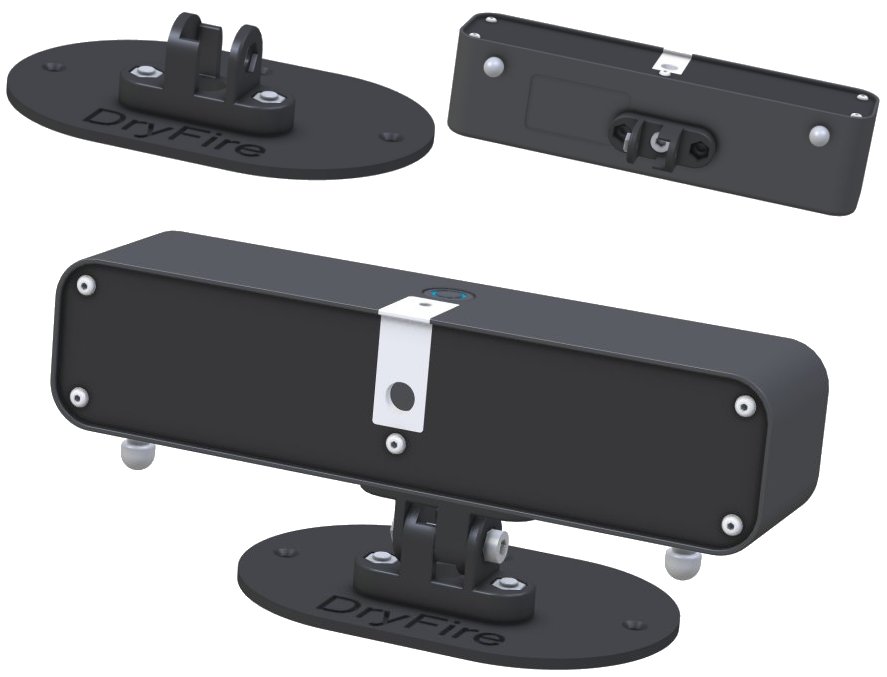
- Fit one half of the mount to the acrylic base using two M5 x 12mm Pozi countersunk screws and M5 nuts. You will need the Pozi 2 screwdriver.
Note: to prevent scratches during transit, the acrylic mounting plate is shipped with protective film on each side. This should be removed with a finger nail (anything harder risks scratching!) then the plate should be washed in washing up liquid, rinsed well and dried with a clean cloth.
- Fit the other half to the DPS-SU tripod bush using the UNC 1/4" x 20TPI screw. You wll need the 3/16" Allen key.
Note: take care not to touch the front panel of the DPS-SU during fitting - fingers leave smudge marks!
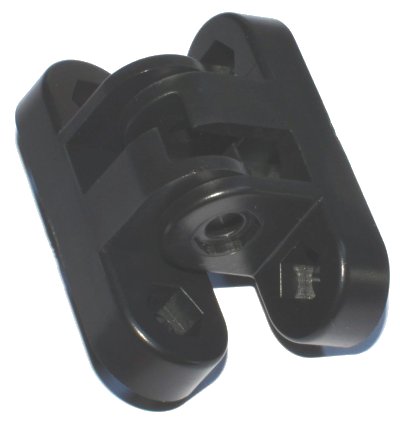
- Connect the two parts of the mount with the M5 x 25mm screw and M5 nut. You will need the 4mm Allen key.
The two parts are identical and designed for a tight fit - so it may be a slight fiddle to get them aligned before inserting the screw - force is not required.
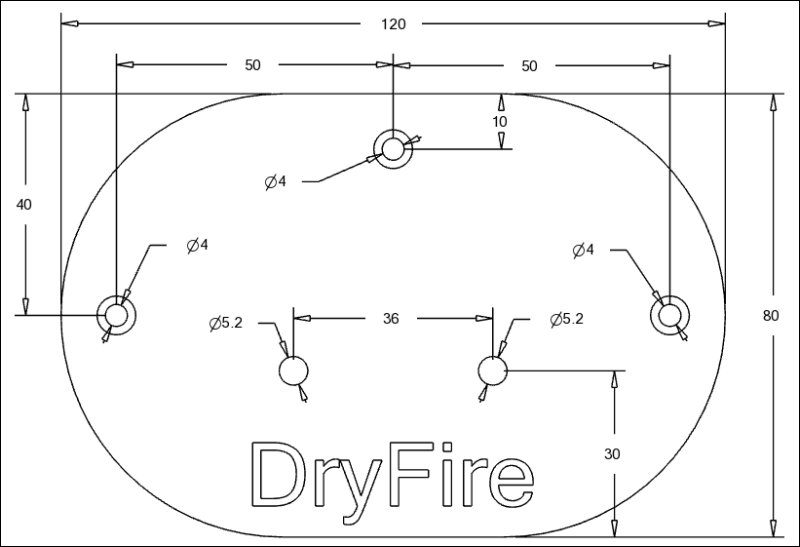
Mounting plate dimensions
Alternative ways to mount the DPS-SU
From top left, clockwise:
- DPS-SU mounted on a mini tripod
- DPS-SU raised up on its feet
- DPS-SU mounted on the DPS-AM
